DIY Network & HGTV Host & Interior Designer/ Build Expert (as seen in HOSS Magazine)
A painted rug cures the “ugly duckling deck blues”! Well, it’s that time of year again… there’s a glimmer of sunshine, summer is on the way – and your deck looks like crap. Don’t worry, it’s not just you. Mine does too! Basically, I like to refer to what we are suffering from as, “the ugly deck blues.” Here are a few ideas to get you tiptop and ready to rock without breaking the bank.!
1: PRESSURE WASH! !
Don’t underestimate the power of a good pressure washing. It’s simple, it’s cheap and it’s effective. Totally my kind of fix! If you don’t have the time to do it yourself, then pick up the phone and call a guy. There are plenty of licensed and bonded companies out there that would love the work. Before pressure washing, my deck looked like it was ready for the boneyard.
Pressure washing took a good 6 years of schmutz off my deck! If you don’t do anything else to update your patio this summer, at least do this.!
Tip: Be careful. If your pressure is too high, there is a chance you can scar the wood.! !
Tip: Deck looking a little green? Grab an eco-friendly deck and patio cleaner to help get rid of the dirt and mildew for good.! !
#2: BRING THE INSIDE OUTSIDE! !
Your deck or patio is your oasis. It allows you a little “mini vacation” every time you walk outside. How do you make it special? My trick – when redecorating your patio, think about what elements make the inside of your home comfy and cozy, and bring them outside, i.e. pillows, candles, canvas drapes & rugs. This will help you create a finished, layered look.! !
Tip: Make a statement with pattern and color – and not just with cushions! Pick 2-3 colors and stick with them. This will help you achieve that cool, tailored look.! !
#3: PAINTER’S TAPE IS YOUR FRIEND! !
Somewhere, someone designed and stained the first deck and, ever since, we have all followed suit. The thing is, even though it’s nice, it never really feels “done”. My deck is about 9 years old, and has never been stained. Pressure washing made it look a heck of a lot better. If I were to stain it, I would be stuck using a semi-transparent or opaque stain in order to hide the age imperfections.!
There’s nothing wrong with this, but I wanted to kick it up a few notches.! ! I’m a city dweller, so the closest I can come to a backyard oasis is 160 square feet of wood slats. I got to thinking, area rugs are a great way to anchor a seating area and bring in pattern and funk. Why not just paint an area rug on my deck? It will add serious drama and hide the imperfections. Scared that you need to be artistic to do this? Don’t be! Well-placed painter’s tape and a stencil are all you need to knock this deck redo out of the park.! !
Tip: I think DIY’ing is always better with company, so I enlisted my trusty sidekick Ross Barnard to help me out. I suggest you invite a friend along, too.
STEPS TO PAINT AN AREA RUG ON YOUR DECK! !
- Tools!
- Painter’s Tape!
- Stencil!
- Deck/Porch paint or something that can stand up to weather and heavy foot traffic. (I
- used Chalk Paint – not to be confused with chalk board paint. The Chalk Paint I used is
- made for outdoor use and is awesome if you’re interested in a vintage vibe.)!
- Tape Measure!
- Pencil or piece of chalk!
- Chalk line!
- Paint Brushes!
- Sponge rollers and paint trays!
- Reposition-able spray glue for the stencil!
STEP 1: Measure out and mark the perimeter of your rug. I wanted to create a border around my main design, so I marked off two rectangular areas.! !
STEP 2: Use the chalk line on your marks to snap a super straight line.! !
STEP 3: Follow your chalk line with painter’s tape, making sure the tape is firmly in place.! !
STEP 4: Lay down the base color of your rug and let dry. I personally like when things look a little aged, so I chose not to do a solid coat of paint. I used a big brush to help me achieve this streaky finish
STEP 5: Stenciling: Lightly mist the back of your stencil with reposition-able spray adhesive. This will help anchor the stencil to the deck so there are less drips. Use a brush or sponge roller and paint over your stencil.! !
Tip: When stenciling, less paint on your brush & light pressure is best, so the paint doesn’t leak under the edges of your stencil.! !
STEP 6: Now that the main part of your rug is finished, you need to paint your border. Peel back the painter’s tap between the patterned area and border. Take fresh painter’s tape and place it on top of the stenciled part of the same line.! !
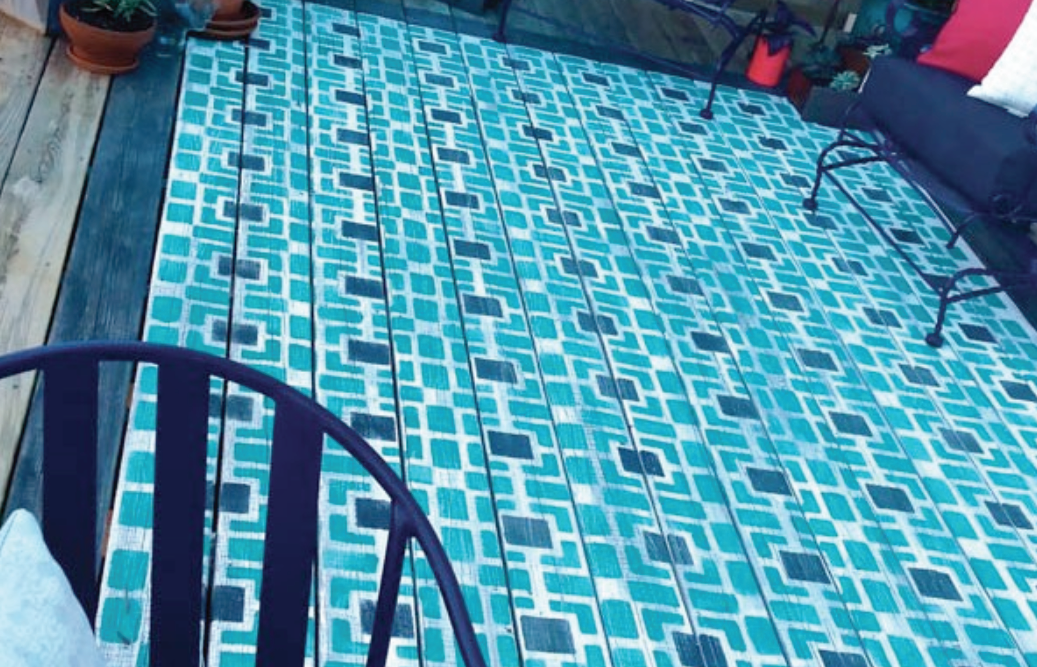
STEP 7: Paint the border, peel back the tape and enjoy. (If you are worried about wear and tear, you might want to add a protective coat. Make sure you use something that is meant to go outdoors!)! !
Tip: I went a step further and did a light hand sanding on the entire painted rug to help achieve that vintage vibe and make it feel a little more worn.